Step 4 - Vegetable Seeds

Vegetable seeds are needed to grow a vegetable garden. Most home gardeners choose to purchase seeds. I recommend selecting and buying from a reputable seed company for best results. A new gardener may not know what will grow best in your area so check in with your local nursery for suggestions.
Use your vegetable garden layout to choose the variety and calculate the number of seeds you will need. This can be done early in the spring to assure you get the varieties you want. Then start planting your seeds once your soil preparation is complete.
Proper timing is very important when planting vegetables. Use my easy to follow garden journal to help you stay on track and organized.
Starting vegetable seeds outdoors:

Sow seeds when conditions are right for that particular vegetable. If the soil is too cold or wet the seed will rot. Learn more about germination.
Mark out the row with a stick, edge of a hoe or your fingers to the depth recommended on the seed packet. If you plant the seed too deep it will not sprout.
Water soil if it is dry.
Sow thinly along the row. Never pour directly from the packet, pour the seeds into your hand and then take the vegetable seeds between your thumb and finger. That way you have more control of how much is planted.
Cover the seed by gently replacing the soil with your hand or the back of a rake. The general rule of thumb is to cover the seed with soil twice the size of the seed.
Firm down the seed bed with your hand or the bottom of a hoe.
Water the seed bed with a fine spray of water; too heavy of a water may wash the seeds away. Keep the soil moist but not soggy. If the weather is hot you may need to water your beds twice a day until the seeds sprout.
Thin the plants after 2-4 weeks of growth.
Starting vegetable seeds indoors:
Some vegetable crops that are difficult to grow outdoors or require a long growing season, need to be started indoors.
With indoor growing you have more control over the amount of light, heat and moisture. You also get a head start on the growing season.

You can buy seed starting kits in most nurseries. The basic items you need are: sterilized potting soil and containers with drain holes - peat pots, cubes, pellets, or paper cups. (Clean used containers with a dilute solution of 1 part bleach to 10 parts water).
- Fill the containers with the potting soil mix, firming the soil to just below the top edge.
- Water the containers so the soil is moist.
- Sow seeds to the depth recommended on the seed packet.
- Cover the seeds with soil. The rule of thumb is to cover the seed to the depth of twice the size of the seed.
- Use a heating pad if seeds require temperatures over 20 degrees C to germinate.
- Give plants lots of sunlight once they sprout.
- Keep the containers moist but not soggy.
- Pot on - some plants i.e. (tomatoes) need to be potted into a large pot after 4-6 weeks of growth
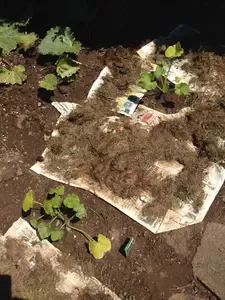
Putting the transplants into the garden bed:
When you transplant your seedlings it is important to transition them from the indoors to the outdoors. This process called hardening off involves setting the plants out on a warm day and gradually extending the time they are outdoors until they are left outside. This process usually take a few days to a week.
- Make sure containers are moist before you start to plant.
- Try not to disturb the roots.
- Dig a hole for the plant and water the bottom.
- Place the plant in the hole, fill in around it and then gently firm it down with your fingers. Make sure you know how deep the plant should be as some need to be deeper than others.
- Keep the plants watered, do not let them dry out.
- Protect the plants, here are 8 ways to protect your vegetable transplants from extreme heat or cold.
Buying transplants:

Not everyone has the time or wants to grow their own transplants so purchasing them from your local nursery is definitely an options. It is important to choose the healthiest looking transplants for best result. Thisi is my list of what to lookf or whecn choosing vegetable
- Compact and bushy
- Leaves and stem are a healthy colour
- Free of any insects or disease
- Not root bound (roots should not be showing through drain holes)
- Not spindly or leggy
A healthy transplant will have a better chance of having a healthy productive growth and harvest.
Your next step to planting a vegetable garden is to maintain plant growth.
Return from Step 4 - Vegetable Seeds to Planting a Vegetable Garden
Recent Articles
-
Organic Gardening soil amendments - List of material?
Aug 09, 25 10:57 AM
 What materials are best used as organic gardening soil amendments?
 -
Tips for disease control in your vegetable garden
Jul 14, 25 11:15 AM
Easy tips for disease control to keep your vegetable growing its best. -
Joy of vegetable Gardening
Jul 14, 25 11:01 AM
Everything you need to know is right here to have Joy of Vegetable Gardening